Gyre SDKDOCS
Custom Layer Types
Custom Layer Types in our AI image editing application are designed to support the integration of complex applications within the editing environment. These layers extend the capabilities of our application, allowing for a rich and versatile editing experience.
Overview
Our application currently supports various layer types, such as 3D and Pose layers. These custom layers provide specific functionalities tailored to different editing needs. For instance, text layers can be utilized for both AI-driven and traditional image editing tasks. The flexibility of our custom layer types paves the way for the integration of other possible types, such as video, audio, and image galleries. So in contrast to tools layer these plugin type stores important data of one layer in the editing process of a document. It is also shown in the layer stack and can be moved around there.
Features
3D Layers
- Allow for the manipulation and integration of 3D objects within the image.
- Enable advanced editing techniques such as 3D modeling, lighting adjustments, and perspective changes.
Pose Layers
- Facilitate pose estimation and manipulation.
- Ideal for applications requiring human pose recognition and adjustments, such as virtual fitting rooms or animation.
Text Layers
- Support both AI and non-AI text editing.
- Enable text recognition, font style changes, and advanced typography effects.
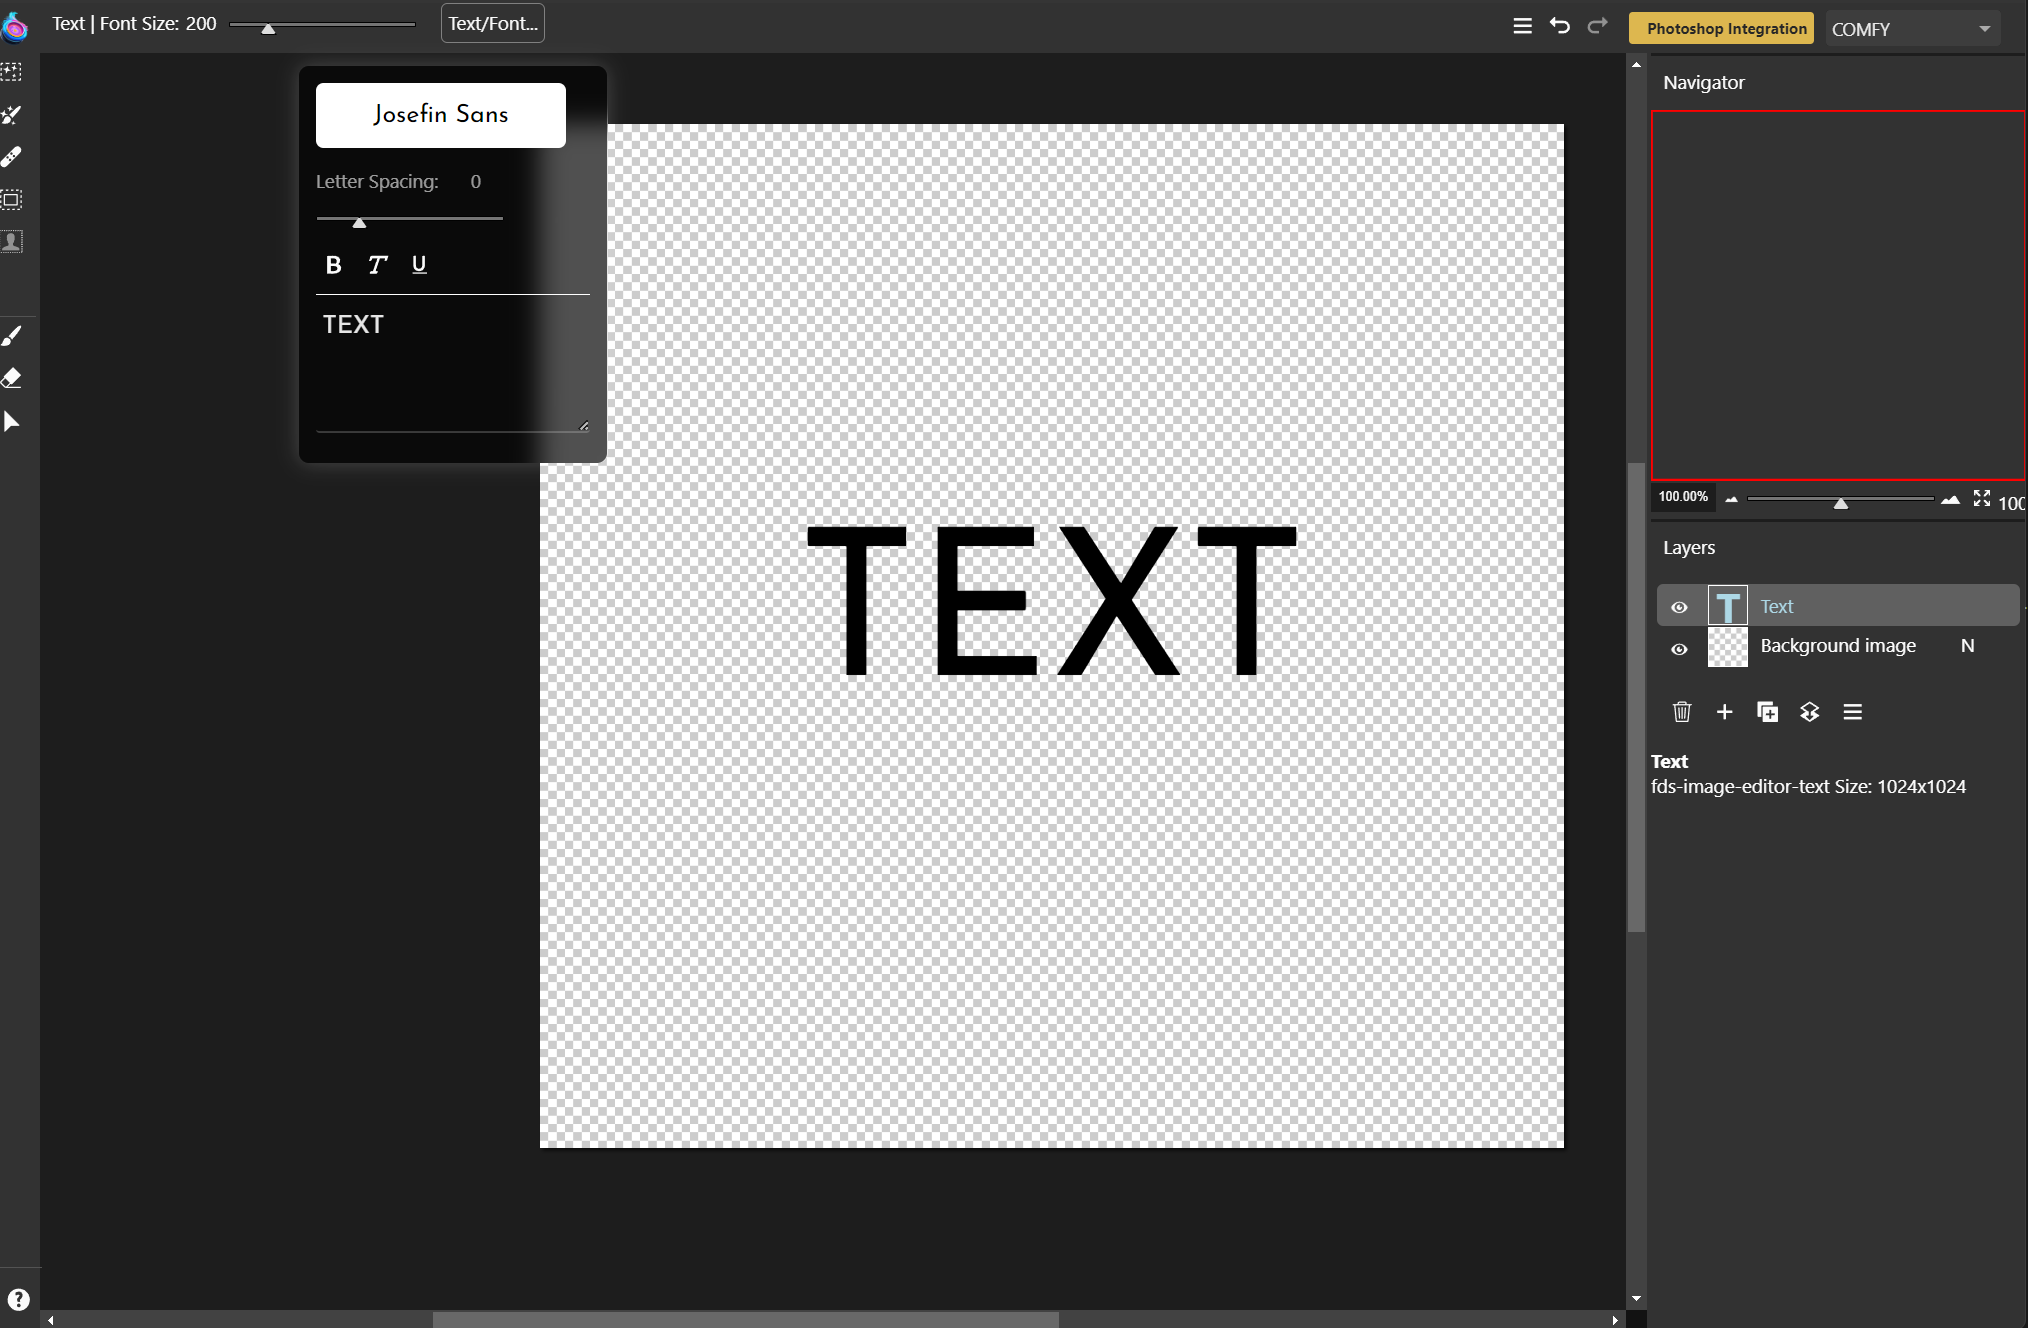
Text Layer integrated as plugin “fds-image-editor-text”
Potential Future Layers
-
Video Layers: Incorporate video editing capabilities, allowing for frame-by-frame editing, video overlays, and transitions.
-
Audio Layers: Add sound editing features, supporting audio overlays, sound effects, and background music integration.
-
Image Gallery Layers: Create and manage image collections within a single layer, useful for photo albums or project-based image grouping.
-
Text Chat Layers: Having an AI LLM Chat bot interface for storing text data of requests and responses.
Data Sources
As these layers store data, users must be aware of where this data is coming from. In the case of text layers, the data source is simply text input. However, others like 3D or Pose layers offer various types of data input via a huge online library or local file upload. For both scenarios, we offer helper tools to assist users.
Development and Testing
These custom layer plugins are developed and tested in separate projects to ensure modularity and ease of integration. The development process involves the use of Web Components, which encapsulate the functionality and styling of each layer type into reusable elements. This approach ensures consistency and compatibility across different parts of the application. For this plugin type we do not offer a test environment so we recommend to have a button for each required function and to show the result.
Integration with Web Components
Web Components technology is utilized for the development of these custom layers, providing several benefits:
- Encapsulation: Each layer type is developed as a self-contained component, making it easier to manage and maintain.
- Reusability: Components can be reused across different projects or instances of the application, promoting consistency and reducing development time.
- Interoperability: Web Components ensure that custom layers can seamlessly integrate with other parts of the application, regardless of the underlying framework or technology stack.
Setting Up a New Layer Type
The steps are similar to Tools plugins, so these are also based on Web Components. For parameter selection, we offer a toolbar at the top. Each layer type needs an additional web component for dialog elements of such a toolbar with the suffix -toolbar
The layer parameter points to an internal data object storing all information of the layer. Both components are used automatically by addding a new layer in the add layer menu (+).
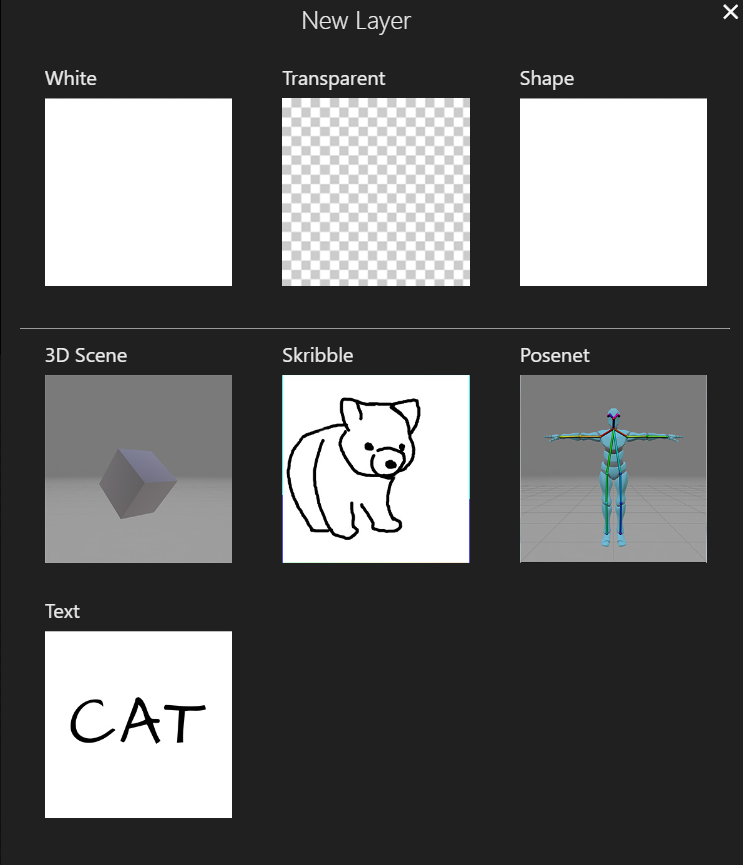
Text layer plugin showing in “Add layer” Dialog.
Both components need to provide a refresh() function which will be automatically called if something has been changed in the main application.
Layer Plugin Functions in Main Web Component
To ensure seamless integration and functionality of layer plugins in our AI image editing application, each plugin must implement the following functions in the main web component. These functions are essential for preparing layers for AI processing, adding new layers, saving and loading layer data, and more.
Required Functions
1. prepareForAI(resultLayer)
- Description: Prepares the layer for AI processing.
- Parameters:
resultLayer: The layer that will be added after AI generation.
- Functionality: Modify the
generatesubobject for any necessary data and update theSpecialLayersarray for adding ControlNet data. - Notes: This is an asynchronous function.
2. layerInstance()
- Description: Prepares the layer before adding to the document.
- Functionality: A custom layer class is required wich extends the base layer class. This custom layer class is connected to the layer type which is the plugin tag name.
3. prepareForSave()
- Description: Prepares the layer for saving in a
.gyredocument. - Functionality: Handle binary data by converting it to a non-binary format using the
dataparameter. The data will be stored with the result ofgetScene(). After loading a new document, the layer will be added to the DOM tree and the main application will callsetScenewith the data value. - Notes: This is an asynchronous function.
4. getLayerMenuHTML(l, thumbClass, thumbStyle)
- Description: Provides the HTML for the layer menu on Desktop and iPad.
- Parameters:
l: The layer.thumbClass: The class for the thumbnail.thumbStyle: The style for the thumbnail.
- Functionality: Generate a thumbnail preview of the layer or an icon.
5. quickMask()
- Description: Provides an automatic mask for inpainting operations.
- Functionality: This function is called from the “Auto” function in the inpainting brush tool.
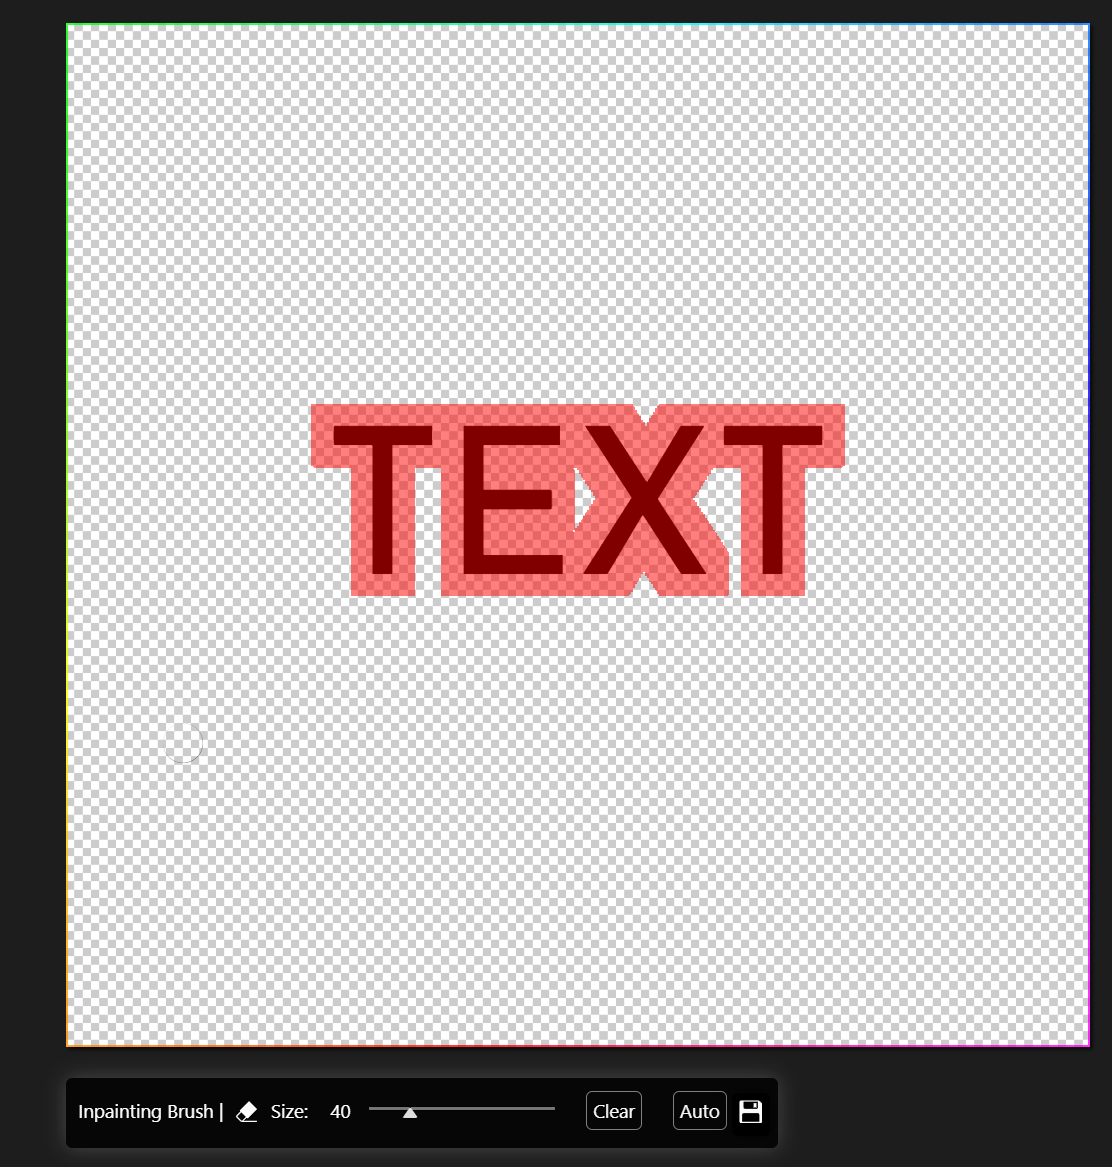
Quick mask example using Inpainting brush tool
6. getScene() and setScene(sceneInfo)
- Description: Serialize and deserialize layer data.
- Functionality: Convert binary data to a non-binary format and vice-versa. The result from
getScenewill be stored in thedataparameter of the layer object in the main application for saving.gyrefiles.
7. refresh()
- Description: Automatically called when something changes in the main application.
- Functionality: Refresh the layer to reflect changes.
Implementing these functions ensures that your layer plugins will integrate smoothly with the main web component of our AI image editing application. These functions handle various aspects of layer management, including AI preparation, adding new layers, saving and loading data, generating layer menus, and refreshing layers. Make sure each function is properly implemented to maintain the application’s performance and user experience.
Manifest
The manifest structure for layer plugins is crucial for defining the properties and functionalities of each layer type within our AI image editing application. Below is the detailed explanation of each property in the manifest structure. The manifest is store in gyre_entry/gyre_ui_layers.json in plugins array
Example Manifest
Properties
-
type: Specifies the type of the layer. This should always be set to
"layer"for layer plugins. -
tag: The tag name of the main component. The dialog component will have
"-toolbar"added. -
title: The title of the layer, which will be displayed in the user interface.
-
js_path: Path to the JS file with both layer components. Paths are defined relative to the Manifest file.
-
controlNet: A boolean value indicating whether the layer supports ControlNet functionalities.
-
quickMask: A boolean value indicating whether the layer provides an automatic mask for inpainting operations.
-
moveTool: A boolean value indicating whether the contents of the layer can be moved around and resized.
-
convertToImage: A boolean value indicating whether the layer can be converted to a normal image layer.
-
letter: A single letter representing the layer in the layer menu.
-
images: An object containing the paths to images required for the “Add Layer” menu.
- largeIcon: The path to the large icon image for the layer (required). Paths are defined relative to the Manifest file.
- largeIconHover: The path to the hover state large icon image for the layer.
Example Usage
When defining a new layer plugin, ensure that the manifest structure includes all the required properties as shown in the example above. This manifest will enable the main application to correctly identify and handle the layer, providing the appropriate tools and functionalities to the user.
Conclusion
The manifest structure is essential for the correct integration of layer plugins in our AI image editing application. By defining properties such as type, title, controlNet, quickMask, moveTool, convertToImage, letter, and images, developers can ensure their plugins are recognized and function as expected within the application.